
Posted on — Leave a comment

St Kitts Crème Brûlée!

Crème brûlée is one of those desserts that are always impressive – and so much easier than they seem! This foolproof recipe adds a herby twist to a delicious classic.

Ingredients:

4 large egg yolks

60g sugar

560mls double cream

113g St Kitts Herbery white cardamom chocolate

½ tsp vanilla extract

4 tsp sugar to top


Method:

.    Preheat the oven to gas mark 2

.    In a medium sized bowl, whisk the egg yolks with the sugar until creamy and smooth.

.    In a saucepan, bring the cream to a simmer over medium-high heat. Add the white chocolate, turn off the heat and whisk until the chocolate is melted.

.    Add 2 tablespoons of the white chocolate mixture to the egg yolk mixture, whisking continually to prevent the eggs from scrambling. This is the most important step to get right or you’ll have a lumpy, egg-y pudding!

.    Add the remaining white chocolate mixture to the egg yolk mixture. Whisk until smooth.

.     Add the vanilla and mix thoroughly.

.    Pour into four 6-inch ramekins or custard cups. Place the cups in a baking pan. Add enough hot water so the cups sit in 1 to 1 1/2 inches of water.

.    Bake for about 45 minutes, until set. If you lightly shake the pan, the crème brulee should wobble with a jelly like consistency.

.    Once cool, refrigerate the custards until chilled – for best results leave overnight.

.    Before serving, sprinkle the tops of each ramekin with 1 teaspoon of sugar. If you can get your hands on a kitchen blowtorch, use this to caramelize the top until golden brown. (If you don’t have a blowtorch then under the grill should work for this). If you’re new to using a blow torch, don’t worry! Just check out this handy guide!

.    Refrigerate for 5 minutes before serving.

Delicious!
                                                                  Delicious!

The cardamom chocolate in this recipe gives this dessert a rich, creamy taste without being too heavy. If you’re short on time, it can be easily adapted into a cold custard recipe!



Posted on — Leave a comment

Rose Cupcakes!

To celebrate the launch of our latest fragrance, dreamy Summer Rose, we’ve whipped up a batch of gorgeously fluffy, super easy Rose Cupcakes. Adapted from this recipe on bakingmad.com, we’ve tweaked until it’s even simpler and just as rosily delicious!

Ingredients:


For the Cupcakes

200g unsalted butter

200g golden caster sugar

30mls St Kitts Herbery rose syrup

4 medium eggs

200g plain flour

1tsp baking powder


For the Topping

200g cream cheese

100g unsalted butter

600g icing sugar

10mls rose syrup (plus extra for drizzling)

5 drops pink food colouring (optional)


Method

– Preheat the oven to Gas mark 4 (180C)

– Beat together the butter and caster sugar until light and fluffy

– Add the eggs one at a time, stirring well until fully combined

– Sift in the flour and mix well

– Fill your cupcake cases with the mixture and bake for 20minutes or until golden brown and firm to the touch

– Leave to cool on a wire rack

– Drizzle the top of the cupcakes with some rose syrup (this is optional- it does make them taste very strongly of rose!)

– To make the icing, put the cream cheese, butter, rose syrup and icing sugar in a bowl and mix until light and fluffy (this is easiest in an electric mixer but a fork works just fine)

– If using, add the pink food colouring and mix well

– For beautiful results, place in a piping bag and ice (for those like me who run out of patience, they taste just as good with the icing spooned on)


That’s all there is to it! If you’re after something a bit more chocolate-y, replace 50g of the flour with cocoa powder and top with a rose chocolate ganache!

Posted on — Leave a comment

Betty’s Buns

Not really a bun but we couldn’t resist the title – our gorgeous Betty has been indulging her passion for baking and in this occasional feature will share her favourite recipes.  Today she is making her raspberry adaptation of Nigella Lawson’s simple chocolate cake – and it’s delicious!

choc rasp cake

I love Nigella Lawson’s recipes, both for taste and simplicity, but especially because they always work. Although her simple chocolate cake recipe is gorgeous as is, I made this adapted recipe with a raspberry twist to satisfy my fruity cravings. For a really naughty treat, replace the raspberry coulis with a raspberry liqueur!

Ingredients:

For the cake:

5oz plain flour

1tsp baking powder

1oz unsweetened cocoa

6oz margarine

6oz sugar

3 eggs

3 tsp vanilla extract

For the topping:

125mls raspberry coulis

2oz butter (or margarine)

6oz icing sugar

2 tbsp cocoa powder (or more to taste)

75g raspberry chocolate

Fresh raspberries to decorate


1. Preheat the oven to about Gas Mark 8 (230C)

2. Grease and line a springform cake tin, around 20cm in diameter

3. Cream together the sugar and margarine in a mixing bowl until     light and fluffy, then add the vanilla extract

4. Add the eggs, one at a time, mixing thoroughly until fully combined

5. Sift in the flour and cocoa and mix well, this should look like a creamy chocolate batter. Fold gently to release any trapped air

6. Pour into the greased and lined tin and bake in the oven for 14-15 minutes, until a knife inserted into the centre of the cake comes out clean. Remove from the oven and leave to cool

7. Whilst the cake is cooling, you can make the butter icing. Sift the flour and cocoa powder into a mixing bowl.

8. Add in the butter and beat (any kind of beater will do, electric, whisk or fork). Continue until it resembles a thick paste.

9. Once the cake is cool, remove from the tin and using a skewer or fork, poke a few holes into the top.

10. Pour the raspberry coulis over the cake and allow time to soak in

11. Pipe on the butter icing (or spoon it on if a piping bag is not easily available!)

12. Grate or curl raspberry chocolate liberally on top of the icing and add fresh raspberries to decorate

13. For best results serve with chilled raspberry coulis and clotted cream


This really is an incredibly easy, mouth wateringly delicious cake.


Posted on — Leave a comment

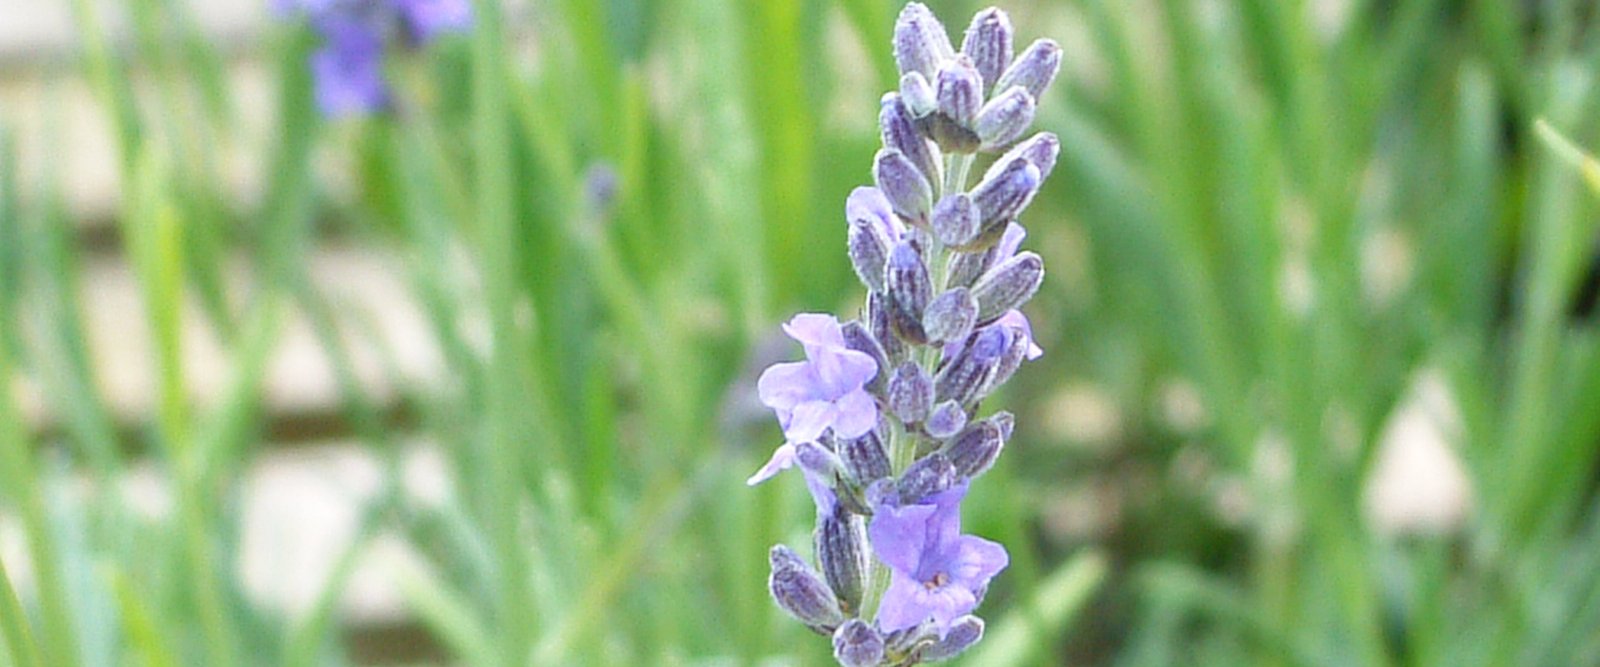
Herb of the Week – Lavandula

Lavandula is probably the most popular and useful of scented garden plants.  Growing to a height of 30cm to 1m Lavender prefers full sun and will thrive in most soils including dry and stony ones; persistently wet situations will cause the plant to die.  They are salt tolerant and make great plants for seaside gardens. Moderately frost hardy to frost hardy, this evergreen is easy to grow  and makes a great container plant.  In Tudor and Elizabethan times it was grown extensively in knot work gardens and even as lawns

Great for adding scent to the home – hang dried bunches around the house for their sweet smell, use dried flowers for lavender bags or pot pourri, or use the essential oil in oil burners or on a cotton wool ball.

Lavender is a calming herb; it aids sleep, can be used to treat minor burns, cuts and bites and makes a fabulous relaxing massage blend.  It can also help relieve muscular aches and pains.

For as long as records exist lavender has been used to create healing balms and potions and was used ritualistically in the embalming of mummies.  Folklore has stories of lavender for healing broken hearts; warding off the evil eye; mixing with other herbs to call upon fairies and spirits; for protection charms; and to attract love.

Once valued as a culinary herb it is making a comeback in the kitchen.  Use sparingly to flavour cakes, biscuits, ice cream or even chocolate.  Try this great recipe for lavender biscuits:

  • 150g butter softened
  • 150g sugar
  • 225g plain flour
  • tsp lavender flowers finely chopped

Put flour, sugar and lavender flowers into  a blender with the butter and blend until it forms a soft dough.   Shape dough into a log and put in fridge for 30 minutes.  Use a sharp knife to cut into thin rounds, place on a greased baking sheet and bake in oven (gas 5 or 190C) for about 15 minutes until golden.


Posted on — Leave a comment

Pip McCormac’s Violet Scones

Have you seen this fantastic new book from Pip McCormac?  We have and it is choc full of wonderful recipes. In fact, we loved it so much that, following a chat with Pip, we have the privilege of being able to share one of his recipes with you, so here are Pip’s Violet Scones!


Violet Scones with honeyed cream

50g butter, plus extra for greasing

225g self-raising flour, plus extra for dusting

25g sugar

150ml milk, plus extra for glazing

1 tsp vanilla extract

3 violet flowers, chopped, plus extra petals for serving

100g clotted cream

2 tbsp runny honey

VioletScones051

I’ve never been a fan of the soapy taste of parma violets, but if you use violet flowers sparingly and bake them they are far subtler – a clever floral note rather than an overpowering flavour. The honeyed cream is what provides the real sweetness here; it’s thick and indulgent and removes the need for jam or butter… although a dollop of lemon curd goes well if you have a really sweet tooth.

Preheat the oven to 225C/Gas mark 7 and line and grease a large baking tray. In a food processor, mix together the flour, butter and sugar until it resembles breadcrumbs. Pour in the milk and vanilla extract and beat into a stiff dough. Add the violet flowers and give a final few pulses of the processor to combine them into the mixture. Lightly dust your worktop with flour and place the dough in the middle, sprinkling a little flour over the top. Using a rolling pin, work the dough until it’s about 2cm thick. Take a 5cm round cutter and cut out discs, placing them onto the baking tray. Roll the leftover dough out again and cut out more rounds, repeating until all the dough is used up. Try not to roll the dough too many times as this will lead to tough scones. Brush the top of each with a dab of milk and place the tray in the oven for 12–15 minutes until golden. Transfer to a wire rack and leave to cool.

Just before you are about to eat the scones, place the cream in a small bowl and briefly fold in the honey – do not mix until combined, you want it to have a rippled effect – and top with a few violet petals. Cut open the scones, spread a bit of cream on top and serve.


This recipe is taken from The Herb and Flower Cookbook by Pip McCormac (Quadrille, £16.99)

9781849494168
Pip McCormac’s “The Herb & Flower Cookbook”

Photograph © Yuki Sugiura

Posted on — Leave a comment

Herb of the week – Calendula

Calendula Officinalis - English Marigold.
Calendula Officinalis – English Marigold.

Calendula officinalis is an annual, reasonably frost hardy plant with medicinal and culinary uses.  It likes well drained soil in a sunny position but will tolerate partial shade.  Growing to a height of approximately 50cms it has vivid orange blooms throughout the growing season, cut these back as the petals die to encourage new growth.  The seedheads of this plant are fabulous, reminiscent of little sea creatures.

The flowers of Calendula are edible and make a pretty addition to salads, they can also add colour to rice dishes and be used as a garnish for fruit.    Or boil them to create a pale dye.

Petals can be added directly to baths, or used to make into simple balms.  The easiest way to use would be to make an infused oil – take a handful of petals and place in a clean sealable jar (such as a kilner jar).  Cover with a neutral smelling oil, sunflower or grapeseed are best, and leave in a warm place.  Change the petals after a week and leave again.  Do this two or three times until the oil has an orange tinge, then strain through muslin and pour into an airtight container.  Store in a cool dry place and use within 6 months.

Calendula is good for dry skin, we use it to make our Heel and Corn Oil, and it is great for gardeners hands.

Some say Calendula makes for the best love potions!

In the language of flowers Calendula is a symbol of devotion and is used by some cultures to decorate wedding feasts and outfits.  Dreams of this plant are said to signify happiness in love or marriage.  Indeed love potions have been made from its flowers and leaves!


St Kitts Herbery products with Calendula:


Calendula Cream 30g, 120g, 500g

Calendula Oil 100ml

Heel and Corn Oil 100ml

Spiced Lime Shaving Oil 50ml


Posted on — Leave a comment

Herb of the week – Moroccan Mint, Mentha spicata var, crispa ‘Moroccan’

The herbs in our plant area are loving the early spring sunshine!

Our mints are among the first herbs to put on new growth in the spring and their fresh, green leaves are a welcome sight after the long, wet winter.

Moroccan mint

Moroccan mint is a particular favourite of ours, as it’s a brilliant culinary all-rounder: use it in vinegar for a traditional accompaniment to spring lamb, mix a few torn leaves through new potatoes or add a scattering to peas.  It’s great in drinks too- Pimms anyone?

Moroccan Mint is also our number one choice for making mint tea, which is traditionally  simply tear a handful of freshly picked leaves into a pot or mug and infuse in boiling water – the longer you steep the leaves, the stronger it will be. If you only have one mint in your garden, let it be this one! 

mint tea


Posted on — Leave a comment

Make your own – Bath Bombs

A great gift idea for all occasions (and our most popular blog post ever!), our bath bombs dissolve in a hot bath for silky smooth, fragrant bath water. Bonus – they’re exceedingly easy to make!

Ingredients:

Witch Hazel Water

Bicarbonate of Soda

Citric Acid

Essential Oil (we like lavender for an extra soothing bath, but anything you like will work!)

Dried herbs, petals, flowers or food colouring  (again, lavender flowers are it for us)


Moulds:

We’ve got the kind of house that always has kids running around, and of course that means kids toys everywhere – so we used a plastic ball pit ball, cut in half (ingenious, we know) as our mould. But you can use anything that has the shape you like – ice cube trays, cupcake tins, whatever you’ve got lying around.

Bath.Bomb.how.to.image

Directions:

  1. Combine equal amounts of citric acid and bicarbonate of soda.
  2. Add a few drops of the essential oil of your choice, plus any flowers or colouring you’re using & mix thoroughly.
  3. Sparingly add Witch Hazel Water (a few drops at a time) until the mixture is just damp enough to hold its shape when compressed. Go easy on adding the liquid- if you add too much the mixture will do all its fizzing in your bowl instead of your bath!
  4. Pack the mixture firmly into both halves of your mould, then push together to join. (If using an ice cube tray or similar, just make sure to compress the mixture into the mould so it doesn’t all fall apart when you take it out).
  5. Allow to set for at least 2 hours before removing from the mould.
  6. If your bomb falls apart when you remove it from your mould, it’s probably too dry- put the mixture back in a bowl and add a few more drops of Witch Hazel water.
  7. Package in some cellophane with ribbon as a gorgeous home made gift – or spoil yourself and get that bath running!